Classroom cleaning sequence
A professional step-by-step guide with the right product for the type of soil, the equipment you need and the safety precautions. Works for: Classroom (desks, tables, chairs, whiteboard).
What you'll need
- Product (by type): Detergent/multi-purpose + disinfectant (or 2-in-1 product)
- Reference dilution: Per the label. Always check the label of the product you use.
- Equipment: Labeled spray bottle, microfiber cloths, dust mop, wet mop, two-bucket system, warning sign
- Protection (PPE): Gloves, mask, goggles, closed-toe shoes
Step by step
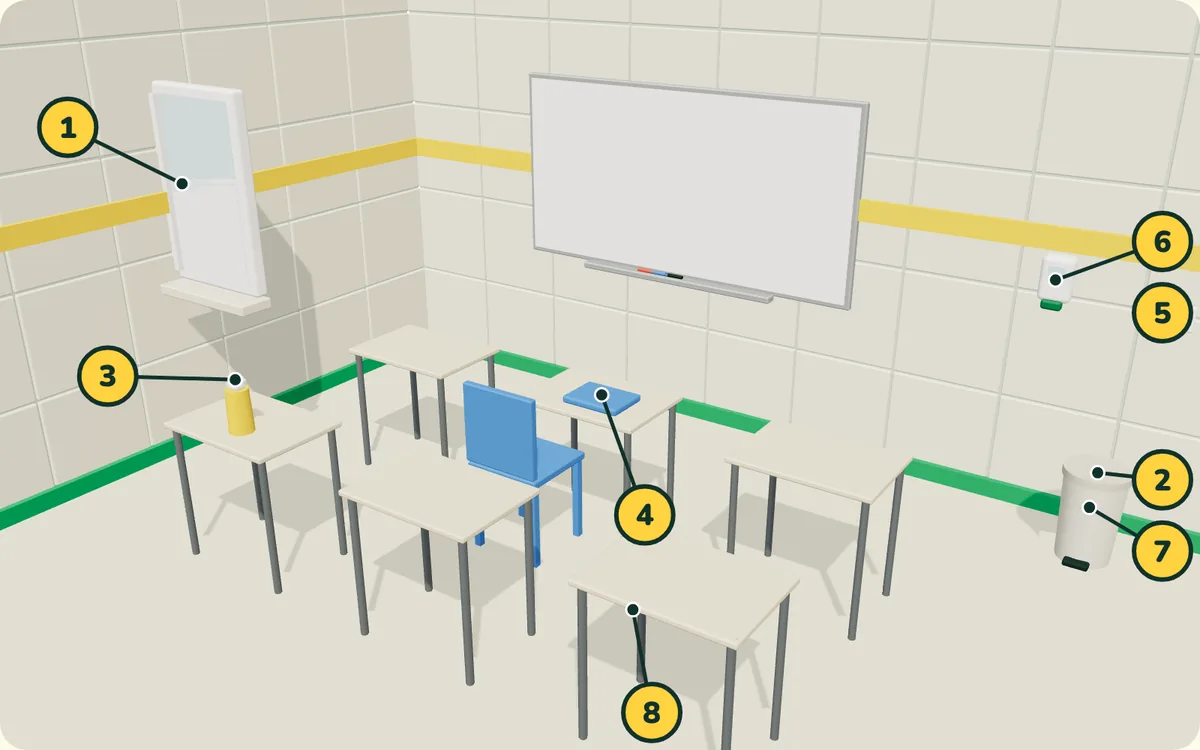
- Open doors and windows to air the room.
- Collect the trash.
- Spray the product onto the cloth (never directly on surfaces).
- Clean and disinfect tables, desks and chairs and the items on them, always wiping in one direction.
- Clean door handles, switches, erasers and whiteboard markers.
- Clean the dispensers (paper, soap, sanitizer).
- Clean and disinfect the trash bin.
- Floor: cordon off the area, remove dust with a damp mop or cloth, wash with a mop and detergent and finish with disinfectant.
Safety tips and common mistakes
Frequently asked questions
What product should I use to classroom cleaning sequence?
Detergent/multi-purpose + disinfectant (or 2-in-1 product). Reference dilution: Per the label. Always check the label of the product you use.
How long should the product sit?
Contact time on the label.
What protective equipment (PPE) should I wear?
Gloves, mask, goggles, closed-toe shoes.
What equipment and supplies do I need?
Labeled spray bottle, microfiber cloths, dust mop, wet mop, two-bucket system, warning sign.
What precautions and common mistakes should I know about?
Do it with the room empty, between classes. Never use a broom — it kicks dust up onto the desks.
Technical content written by MiLimpa based on professional cleaning methods (School cleaning manual; Higher-education cleaning training). Initial version, under technical review. Always follow the label and safety data sheet of the product you use.